Plant diseases and pests can significantly impact crop yields and quality, leading to economic
losses for farmers. Early detection and accurate identification of these issues are crucial for
effective management and prevention strategies. Image classification using computer vision techniques
plays a vital role in this process, enabling farmers to quickly identify diseases and pests from
images captured by drones or cameras.
By training custom image classifiers, farmers can leverage machine learning algorithms to recognize
specific diseases and pests based on visual patterns in plant images. These classifiers can be trained
on images of healthy and diseased plants, allowing them to distinguish them based on visual features.
Once trained, these classifiers can analyze new images in real time, providing farmers with instant
feedback on the health of their crops.
How to train a grapevine disease image classifier for agriculture
DeepLab provides an intuitive interface for managing datasets, annotating images, and training custom
image classifiers, allowing users to create models that can accurately classify images based on specific
criteria. In this tutorial, we will walk you through the process of training a custom image classifier
using DeepLab, focusing on a practical example of classifying grapevine diseases.
For the purpose of this tutorial, we will use a
dataset of grapevine diseases. This dataset contains images of grapevines affected by various diseases,
such as downy mildew, powdery mildew, and black rot. The images are labeled to indicate whether the grapevine
leafs are healthy or affected by a specific disease. The goal is to train a custom image classifier that can
accurately identify the presence of these diseases in new images.
1. Open DeepLab and create a new folder
Sign in to your Abraia account and go to
DeepLab, to start creating a new dataset folder (related to your
classification task) called "grapevine". This is where you'll organize your dataset and training-related files.
2. Download the dataset and upload the images
Download the dataset and unzip the files to a location on your local machine. Then, click the "upload" button
to select and upload the images from the unzipped dataset to the "grapevine" folder in DeepLab.
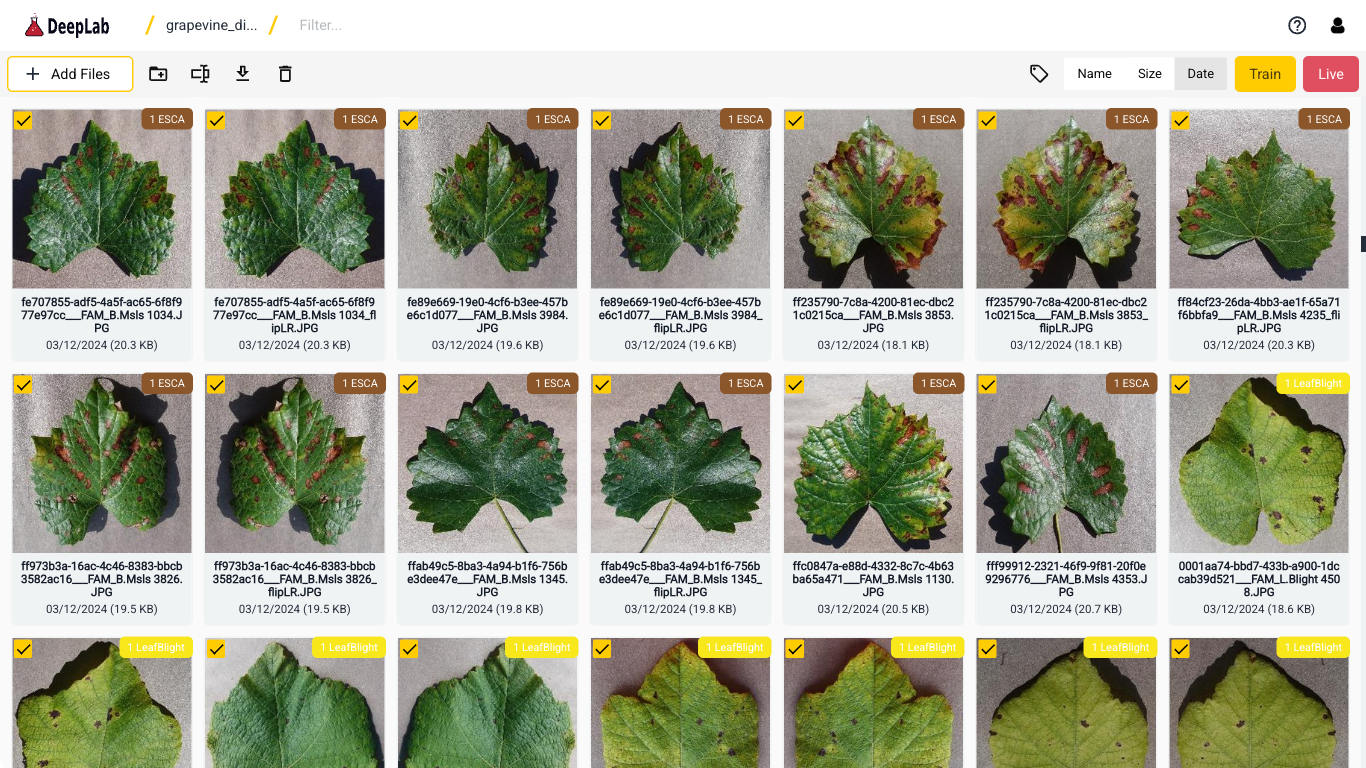
3. Annotate the grapevine leaf images
Select all the leafs images with the same disease clicking on every thumbnail checkbox. Then, click on the
"annotate" button, and enter the disease name as label. Repeat this process for another group of images with
the same disease, ensuring that each group is labeled correctly. For example, if you have images of grapevine
leafs affected by downy mildew, powdery mildew, and black rot, you would create separate annotations for each
disease.
4. Train and export your classification model
Click on the "train" button to start the training process. A notebook interface will open. Input your User ID
and the API Key in the notebook. These credentials are necessary for accessing the Abraia's training resources.
Then click "run all" to execute the training dashboard, which be in charge of loading the dataset, defining and
training the model. You just will need to select the dataset project name "grapevine" and click on the "train"
button.
Once the notebook finished execution, the trained model will be saved in the "grapevine" folder.
5. Test the model in your own device with DeepLab
Navigate to the "grapevine" folder and select the images you want to test. Then, double-click on one of the
selected images to open the testing interface. DeepLab will display the model's predictions, indicating whether
the leafs are classified as some of the trained diseases.
Congratulations! You have successfully trained a classifier for diseases prediction using DeepLab. This tutorial
provides a basic overview, and you can further explore advanced features, optimize your model, and fine-tune
parameters based on your specific use case.